Table of Contents
Table of Contents
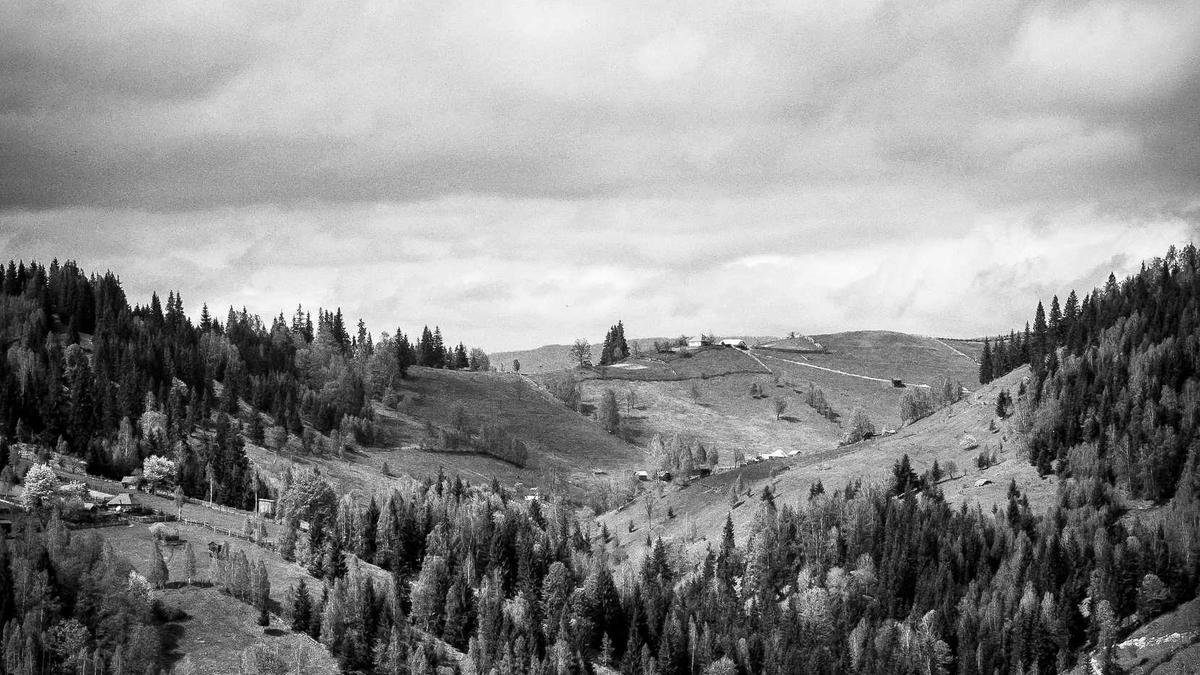
Why Aerial Panoramas Demand a Different Approach
Shooting a panorama from a drone is not the same as stitching together handheld shots on the ground. The drone's movement, gimbal stability, and the sheer scale of the scene introduce unique challenges. A single wide-angle drone shot often lacks the resolution and field of view needed to capture the grandeur of a mountain range, coastline, or city skyline. Aerial panoramas solve this by combining multiple overlapping frames into a single high-resolution image that can be printed large or cropped flexibly.
The key difference lies in the shooting geometry. On the ground, you rotate your body around a fixed point. In the air, the drone moves through space, creating parallax errors if not managed carefully. To minimize parallax, you must keep the drone stationary and rotate only the gimbal. Most modern drones, including the DJI Mavic 3 and Autel EVO Lite+, offer a dedicated panorama mode that automates this process. However, manual shooting gives you more control over exposure and composition.
Key Stat: A properly stitched 360-degree aerial panorama from a 20MP drone can yield a final image exceeding 100 megapixels, enough for a 40-inch print at 300 DPI.
Understanding the trade-offs between automated and manual modes is essential. Auto panorama modes are fast and convenient, but they lock exposure and white balance across all frames. In high-contrast scenes, this can blow out highlights or crush shadows. Manual mode lets you bracket exposures for each frame, giving you HDR panoramas with greater dynamic range. For professional work, manual shooting with raw files is the gold standard.
Camera Settings and Gimbal Technique for Stitch-Ready Frames
Consistency between frames is the single most important factor for a successful stitch. If exposure, white balance, or focus changes between shots, the stitching software will struggle to blend them seamlessly. Start by setting your camera to full manual mode: fixed ISO, shutter speed, aperture, and white balance. Use a low ISO (100-400) for maximum dynamic range and minimal noise. Aperture should be around f/5.6 to f/8 for optimal sharpness across the frame.
Focus is another critical variable. Autofocus can shift between frames, especially if the drone moves slightly. Switch to manual focus and set it to infinity. On most drones, you can tap the screen to focus on a distant object, then lock focus by switching to manual mode. This ensures every frame is equally sharp. For the gimbal, set a slow, consistent rotation speed--typically 2-3 degrees per second. Jerky movements introduce motion blur and misalignment.
Overlap is the glue that holds the panorama together. Aim for at least 30% overlap between adjacent frames, both horizontally and vertically. For complex scenes with lots of detail (forests, buildings, water), increase overlap to 40-50%. The drone's auto panorama mode typically uses 20-25% overlap, which is sufficient for simple landscapes but risky for intricate subjects. When shooting manually, use a grid overlay on your screen to track your rotation and ensure consistent spacing.
Shooting Sequences: Single-Row, Multi-Row, and 360-Degree Spheres
The type of panorama you want dictates your shooting sequence. A single-row panorama is the simplest: rotate the gimbal horizontally while keeping the drone's nose pointed in one direction. This works well for wide but not tall scenes, like a coastline or a mountain ridge. For a taller field of view, such as a canyon with a dramatic sky, use a multi-row sequence. Shoot one row at a low gimbal angle (e.g., -30 degrees), then tilt up to -10 degrees, then +10 degrees, overlapping each row by 30%.
360-degree spherical panoramas, also known as equirectangular projections, require a full sphere of coverage. Start by shooting a full horizontal rotation at a low angle, then tilt the gimbal up and repeat, covering from straight down to straight up. Most drones have a built-in sphere mode that does this automatically, but the results are often limited to 8K resolution. For higher quality, shoot manually with raw files and stitch in software like PTGui or Adobe Lightroom.
Timing matters. Shoot during the golden hour or blue hour for the most dramatic light. Avoid midday when harsh shadows and high contrast make stitching difficult. Wind is another factor: gusts can cause the drone to drift, introducing parallax. Fly in calm conditions (winds under 15 mph) and use a hover mode or GPS lock to keep the drone stationary. If your drone has an obstacle avoidance system, disable it during panorama shooting to prevent sudden stops that ruin the sequence.
Stitching Workflow: Software, Alignment, and Blending
Once you have your sequence of raw files, the stitching process begins. Adobe Lightroom Classic offers a built-in Photo Merge > Panorama feature that works well for most single-row panoramas. It handles lens distortion correction and exposure blending automatically. For multi-row or 360-degree panoramas, dedicated software like PTGui or Autopano Giga provides more control. These tools allow you to manually control control points, adjust projection types (cylindrical, spherical, or perspective), and fine-tune blending.
Start by importing all frames into the software. If you shot in raw, convert to DNG or TIFF first to preserve dynamic range. The software will analyze the images and attempt to align them based on overlapping features. If alignment fails, add manual control points--identify the same feature (a rock, a cloud, a building corner) in two overlapping frames and mark it. Add at least 3-4 control points per overlap for reliable alignment.
Choose the right projection. Cylindrical projection is best for wide horizontal panoramas (e.g., 180-degree views). Spherical projection is required for 360-degree spheres. Perspective projection works for narrow fields of view but introduces distortion at the edges for wide scenes. After alignment, check for ghosting or double images caused by moving objects (clouds, birds, waves). Use the software's de-ghosting tool or manually mask out the offending areas. Finally, export as a 16-bit TIFF for maximum editing flexibility.
Post-Processing and Output for Maximum Impact
The stitched panorama is a massive file--often 100-200 megapixels. Editing such a large image requires a powerful computer and careful workflow. Start by applying lens corrections if not done during stitching. Then adjust global exposure, contrast, and white balance. Because the panorama covers a wide field of view, the sky and foreground may have different exposure needs. Use graduated filters or local adjustments to balance them.
Sharpening is critical for large prints. Apply output sharpening based on the final medium: for web, use a radius of 0.5-1.0 pixels; for print, use 1.5-2.0 pixels. Avoid over-sharpening, which amplifies stitching artifacts. Noise reduction should be applied sparingly, especially in the sky. If the panorama includes the drone's shadow or propellers, clone them out using the spot healing brush.
Finally, consider the output format. For web use, export as JPEG with sRGB color space at 3000-5000 pixels on the long edge. For print, export as TIFF or high-quality JPEG in Adobe RGB or ProPhoto RGB at full resolution. A 100MP panorama printed at 300 DPI yields a 20x30-inch print--perfect for gallery display. Always keep the original raw files and the stitching project file (e.g., .pts for PTGui) for future re-edits.
Beyond the foundational techniques, developing a personal workflow around aerial panorama shooting stitching drone landscapes can significantly improve your consistency and results. Many photographers find that creating a routine helps them avoid common oversights and ensures they capture the best possible image in any situation. Over time, this workflow becomes second nature, allowing you to focus more on creative decisions and less on technical adjustments.
Another valuable approach is to study how experienced photographers handle aerial panorama shooting stitching drone landscapes in their professional work. Analyzing real-world examples provides insight into techniques you may not have considered and reveals creative solutions to common challenges. Try recreating specific shots you admire, then adapt the underlying principles to your own style and subject matter.
The equipment you use for aerial panorama shooting stitching drone landscapes matters less than how well you understand its capabilities. Mid-range gear used with skill consistently outperforms high-end equipment in inexperienced hands. Focus on mastering your current tools before upgrading, and you will develop a deeper appreciation for how each adjustment contributes to the final image.
Consistent practice with aerial panorama shooting stitching drone landscapes is the single most effective way to improve. Set aside dedicated time each week to experiment with new techniques and review your results critically. Keep a log of settings, conditions, and outcomes so you can identify patterns and refine your approach over time. Deliberate practice accelerates learning far more than sporadic shooting.
Sharing your work and discussing aerial panorama shooting stitching drone landscapes with a community of fellow photographers can provide valuable perspective. Online photography forums, local camera clubs, and social media groups offer opportunities to have your work reviewed by peers who may notice strengths and weaknesses you have overlooked. Constructive criticism helps you grow faster than working in isolation.